How to install hardwood flooring
Today, hardwood is the most popular type of flooring in the world. It is distinguished by its aesthetics, durability, hypoallergenic and environmental friendliness. The material has an increased cost due to the fact that it is made of natural wood. The average service life of a hardwood floor is 25 years or more. It perfectly retains heat in the room, is safe and provides good sound insulation.
Installing hardwood flooring is not particularly difficult, but there are several nuances.
The main disadvantage of the material is its needs for care. It does not like moisture, so it should not be washed often. Also, periodically, the floor needs to be rubbed with special compounds so that it shines and retains its appearance.
Hardwood installation methods
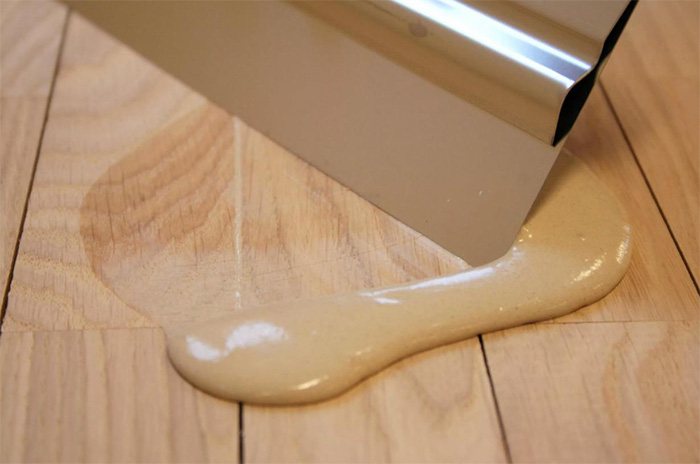
Glue
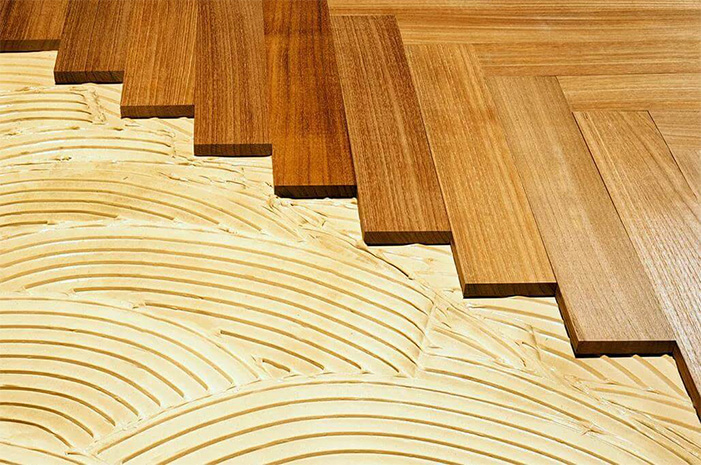
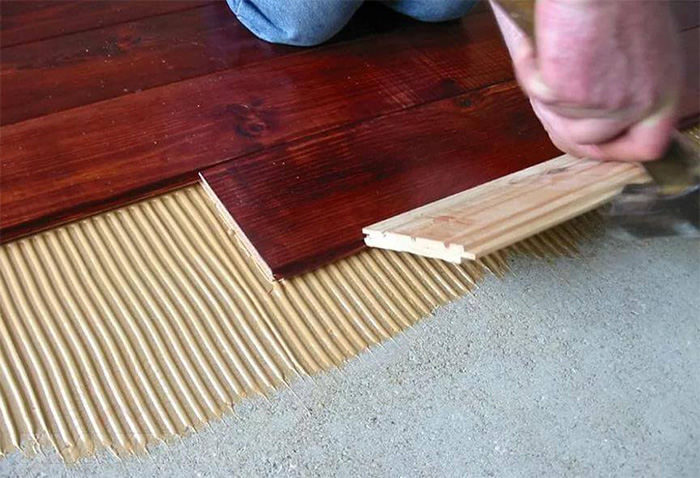
It is mainly used in cases when installation is carried out on a plywood base. The planks are planted with a notched trowel on the thick glue. The choice of adhesive depends on the type of flooring board. For example, glue containing more than 50% water in its composition is generally not suitable for hardwood. The disadvantage of this method is that it is not recommended to carry out any other types of work in the room until the adhesive layer is completely dry. At the same time, the parquet laid in this way will firmly adhere to the base.
Floating
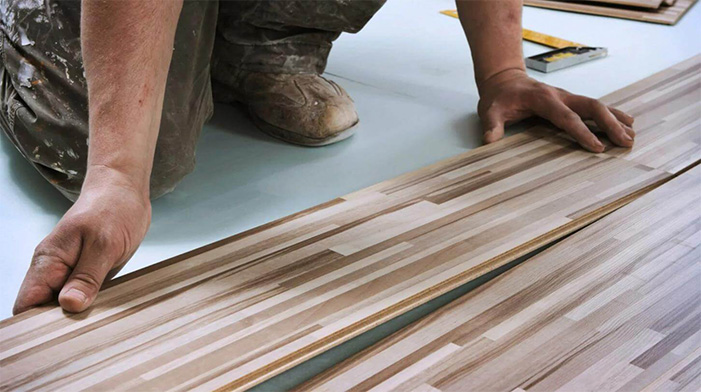
With this method of installation, the strips are connected to each other according to the «key-lock» principle. Each plank has special ridges and grooves that fit together. The advantage of this method is that the floor covering can be easily dismantled, for example, if it is necessary to replace a damaged strip.
For fasteners

Fastening the boards can be done with screws and nails. In this case, plywood most often acts as a base. This method is rarely used, more often installers prefer the first two.
The most popular way of hardwood flooring installation is adhesive. There are three main types of adhesives:
- Solvent based. The seizure lasts for 25 minutes. The period of complete drying is 3-5 days;
- On a dispersed basis. It is relatively inexpensive and dry quickly. Not suitable for exotic wood flooring, but ideal for oak. The floor can be sanded 5 days after installation;
- Reactive. They are made on the basis of polyurethane. The most expensive and fastest drying. Perfect for solid and exotic wood planks. It is allowed to sand the floor covering one day after its installation. It requires care when working, because if it hits the front side of the board, it can ruins its appearance.
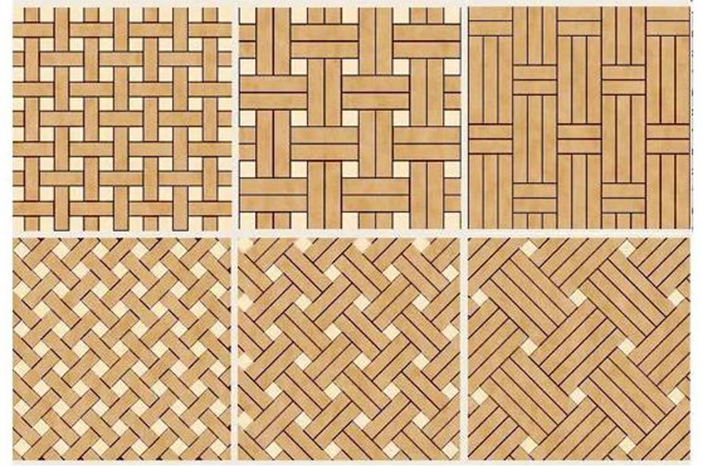
Hardwood flooring layouts
During choosing a styling method, you need the following factors:
- Combination with interior design;
- Feasibility of using one or another installation method, since some of them require more materials;
- Type of base: screed or plywood;
- Allowable budget.
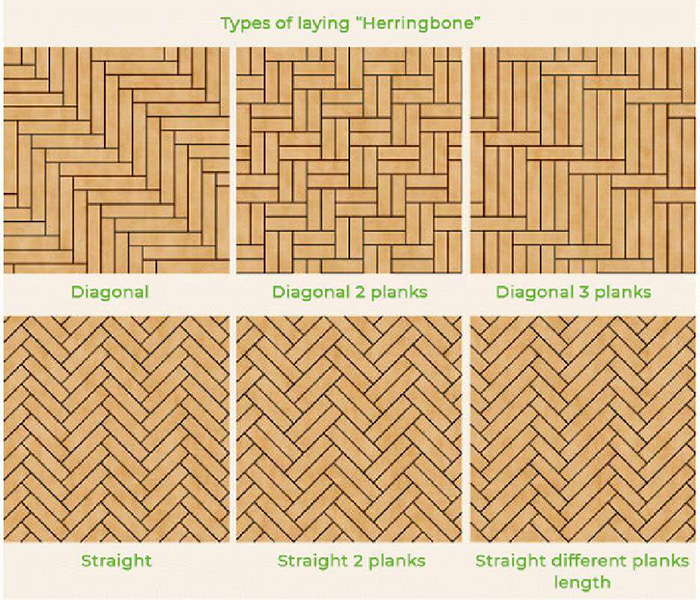
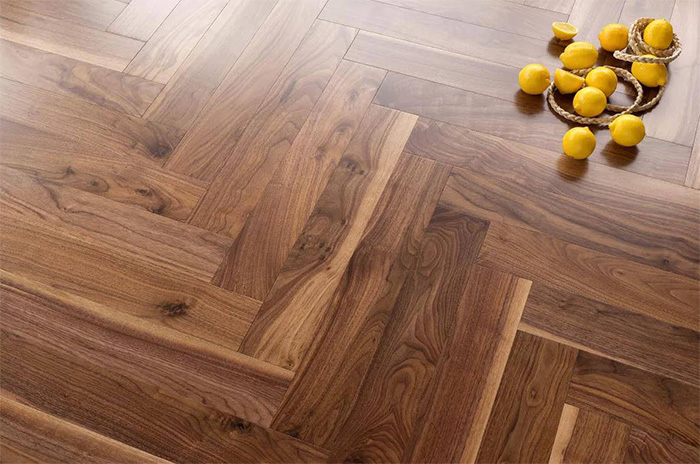
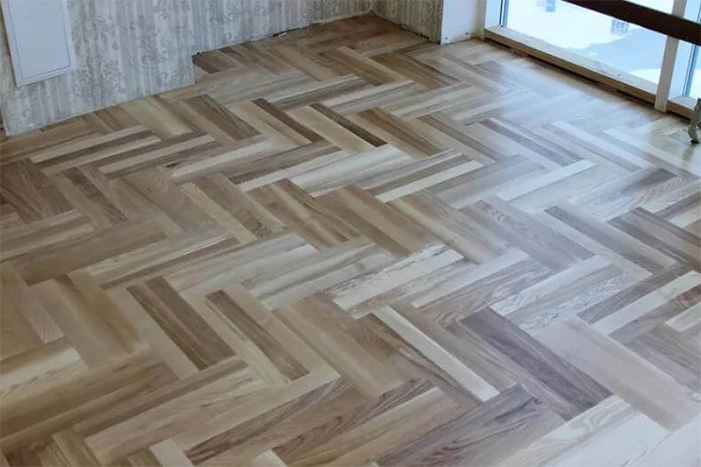
Herringbone
There are various variations of this scheme. The most common is classic. With it, the planks have a rectangular shape and are installed perpendicular to each other and at an angle of 45 degrees to the wall.
Stages of installing hardwood flooring to the herringbone pattern:
- We make markings, divide the floor exactly in half, pulling the cord tightly along the separation point;
- On the side of the floor, a dry strip of 5-6 planks and lay them out perpendicularly;
- We draw a wide line of glue along the cord and mark the Christmas tree in the middle of the room;
- We lay the hardwood board along this landmark from top to bottom and to the sides;
- We cut off the extreme planks in a straight line and make a frame from parallel planks.
We leave a gap of 10-20 mm between the covering and the wall. It is needed in order to compensate for the movement of the floor covering during temperature extremes.
The hardwood is laid with a herringbone pattern diagonally.
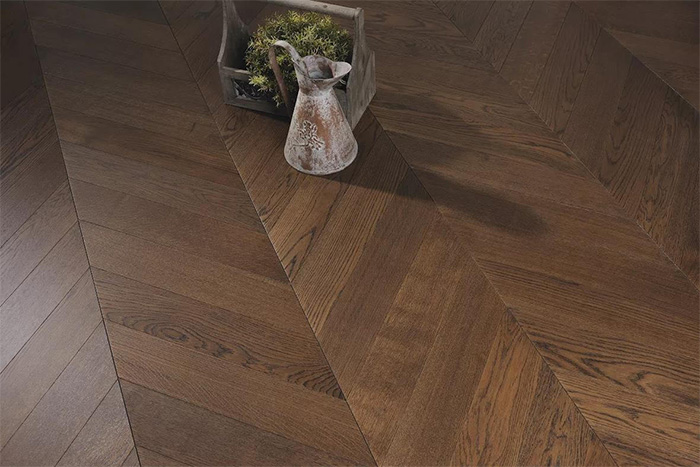
When installing the floor covering according to the «French tree» scheme, parallelepiped boards are used. For the price, they are higher than ordinary boards, as they require additional trimming.
The main advantage of the herringbone scheme is the uniform distribution of the load on the floor surface. Also, the exact geometry of the planks is not required, all minor flaws are hidden during the installation and scraping process.
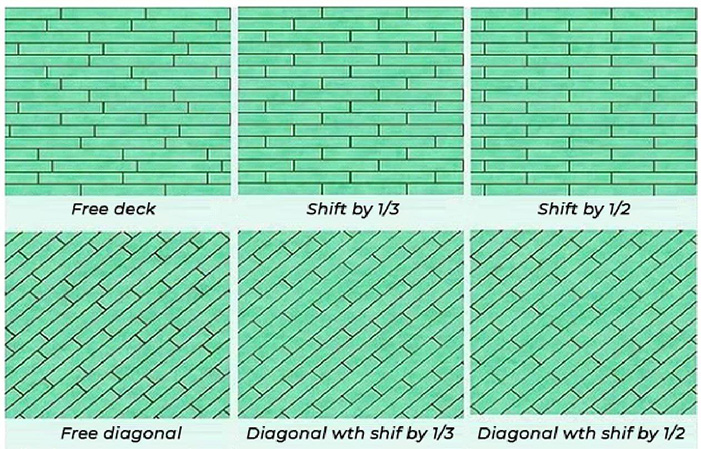
Classic deck laying of hardwood
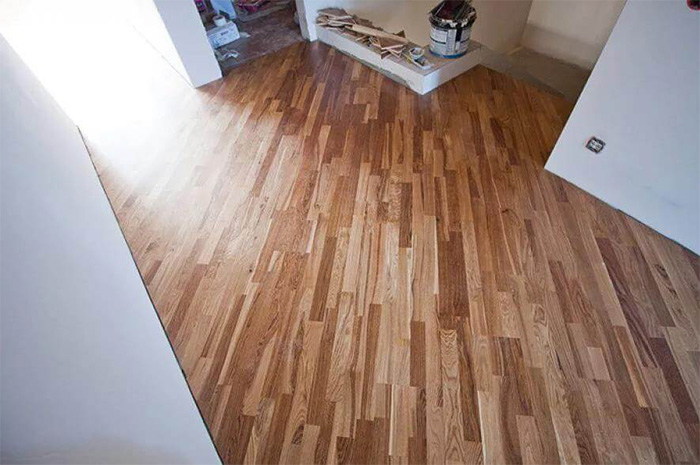
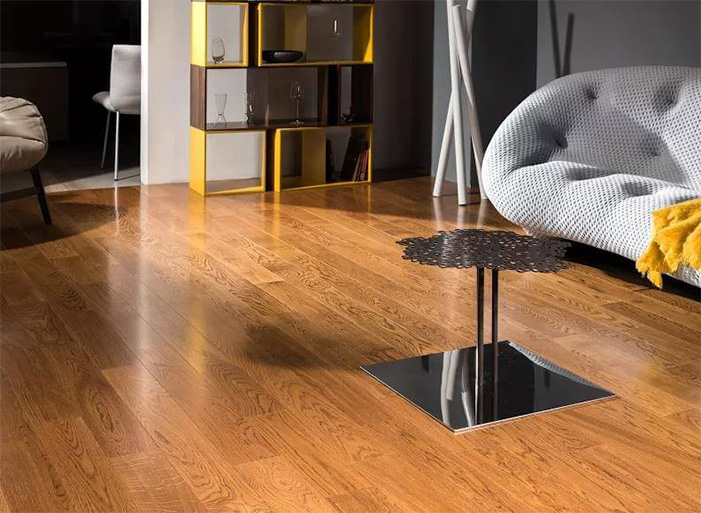
In this case, the planks are laid parallel to each other in the same direction. This method is simple and economical, since as a result there are almost no scraps.
The boards are laid with a symmetrical and chaotic shift in two ways of arrangement: vertically and diagonally.
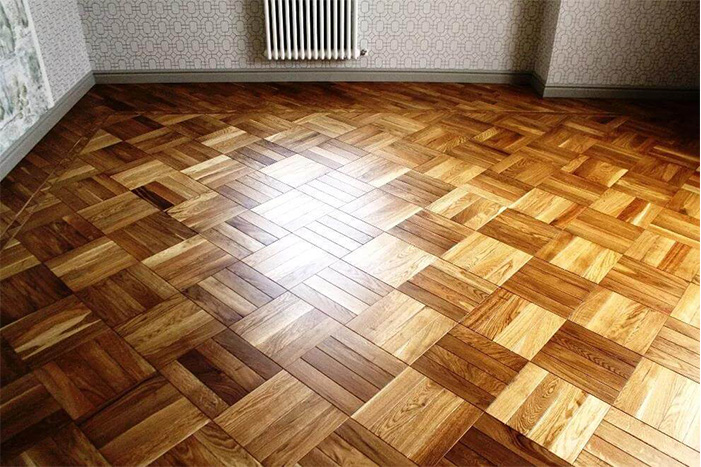
Hardwood flooring installation in squares
Due to the alternation of longitudinal and transverse planks, a kind of chessboard is obtained. If desired, each module can be surrounded by frames to improve decorative properties. The only drawback of this method is that it is not always suitable for spacious rooms, since large figures can simply eat up the space.


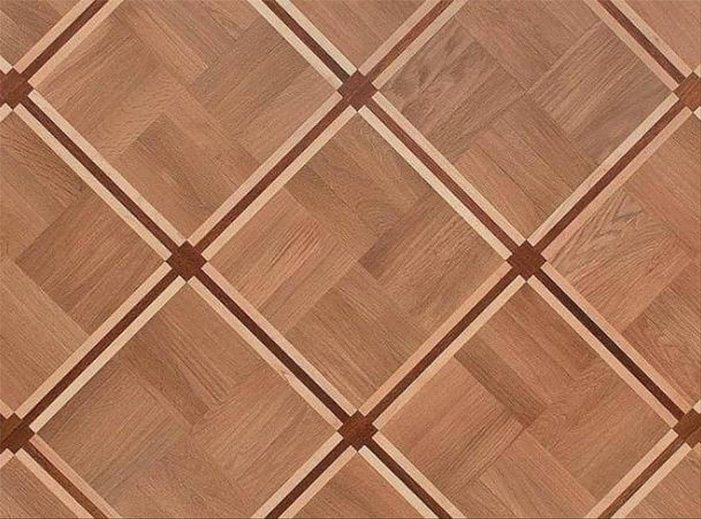
Network
Refers to the artistic types of hardwood laying and is the most difficult variation of them. It looks quite impressive, but after it there is a lot of waste, which affects the cost — on average, this method requires about 20-30% more material than other types of installation.
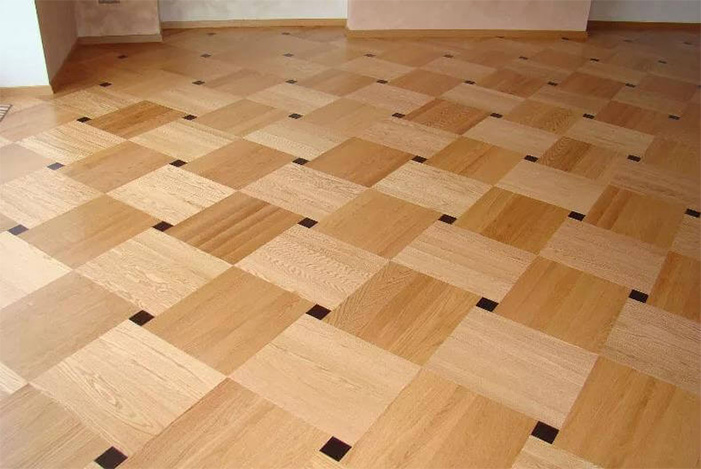
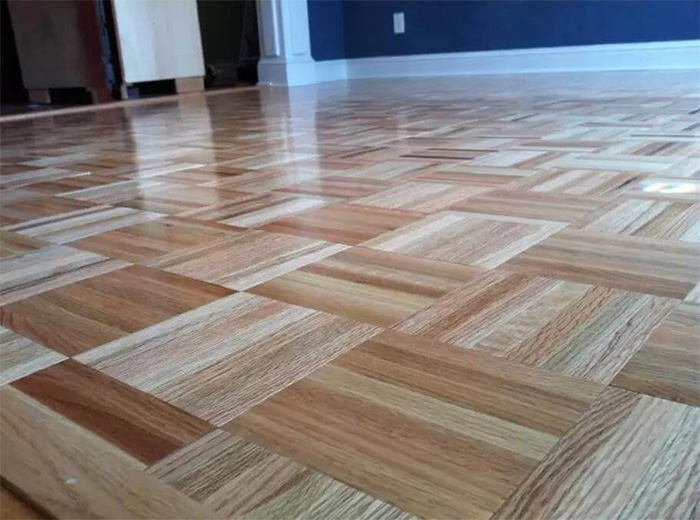
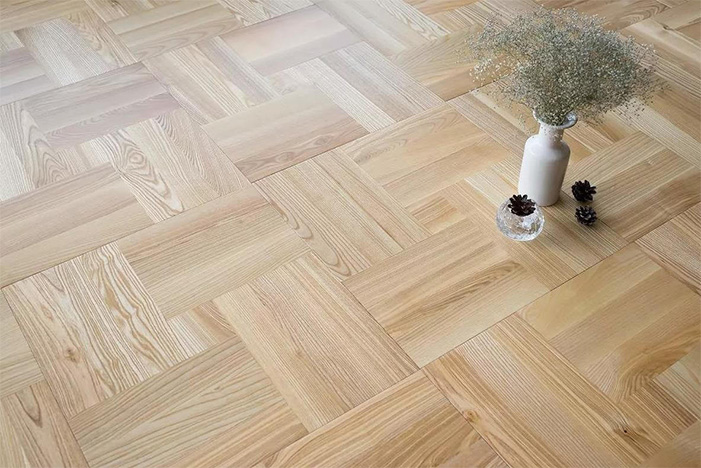
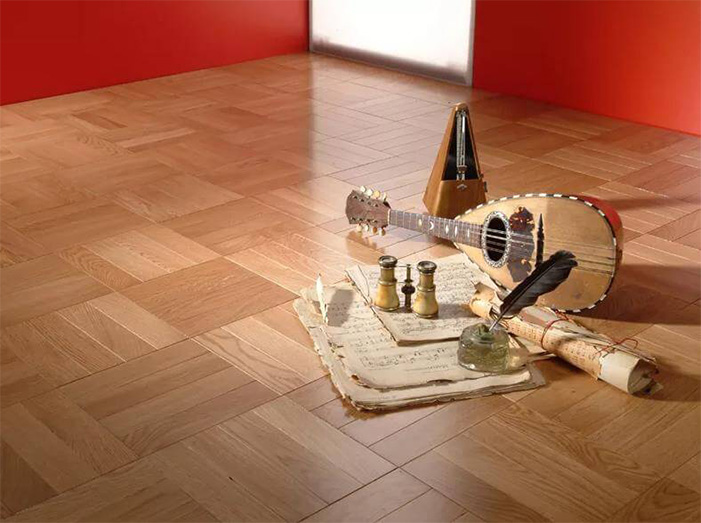
Checkers
This is relatively simple way of hardwood flooring installation. The squares are assembled from parquet planks and laid with perpendicular rotation to each other. As a result, we get a kind of play of squares in the light. Combinations of different materials are possible, eg oak and ash.
Hardwood laying with «checkers» has a number of features:
- Half of the planks used should have a right lock and half a left one;
- When using materials of different textures, it is necessary to redo some of the plank locks. For this purpose, separate grooves and ridges are created. Such work has to be paid separately;
- When dividing the length of the planks by the width, there should be no remainder to ensure the symmetry of the square. For this, material is selected 5 x 40 and 6 x 42 cm.
Scandinavian style
The second name of this method of hardwood flooring is «Swedish». The main difficulty in this type of laying is the milling of the locks on the end faces of the planks. Installation is possible without fixing the strips on one side, but experts do not recommend doing this, since in the future such a covering will be more susceptible to deformation. The diagonal stacking scheme is used extremely rarely because of its complexity and inexpediency.
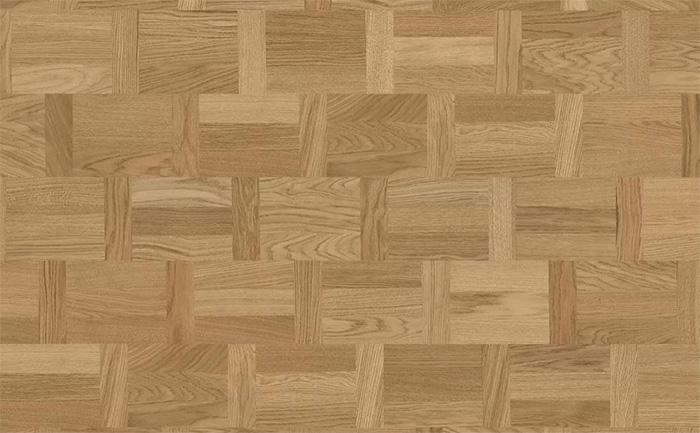
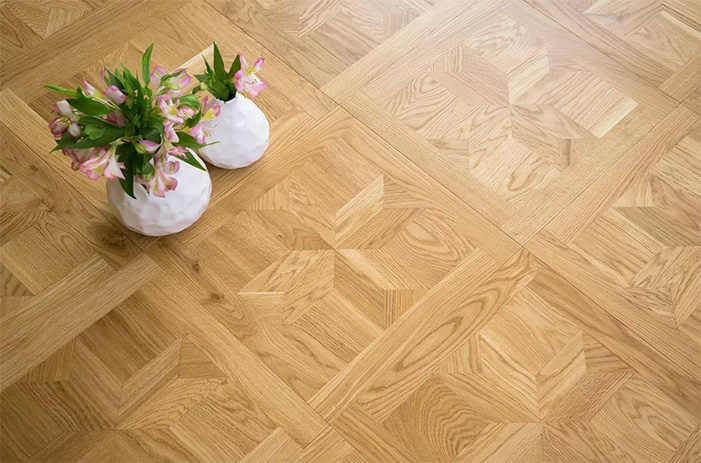
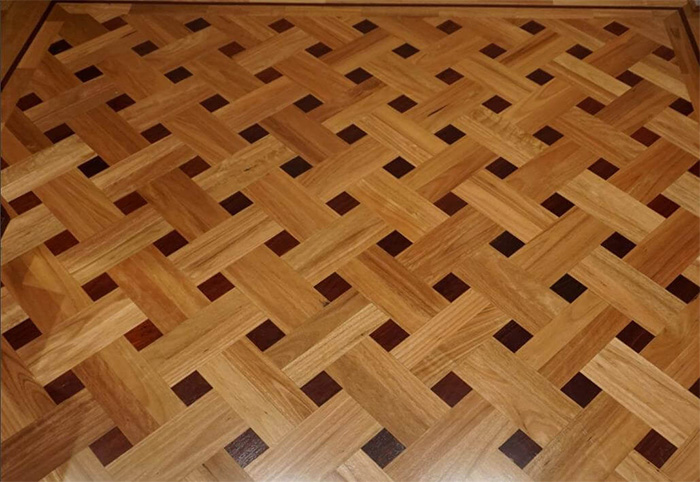
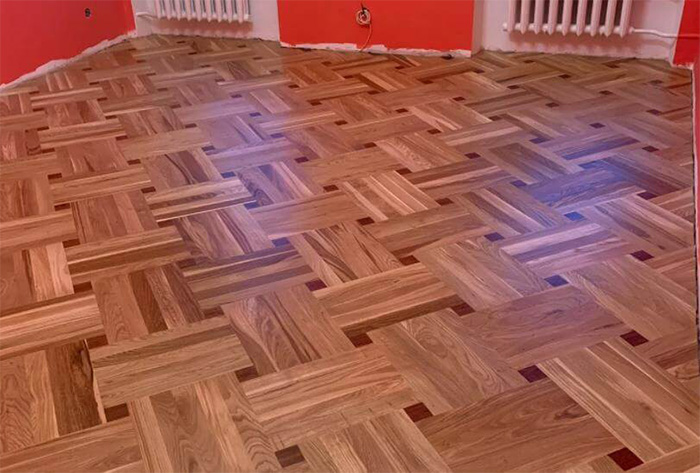
Well
With this method of installing parquet, the squares, enclosed in single or double dies, are joined to each other in a staggered configuration. The pattern looks like a lattice.
To improve the aesthetic properties of the floor, planks of different types of wood with contrasting shades are used.
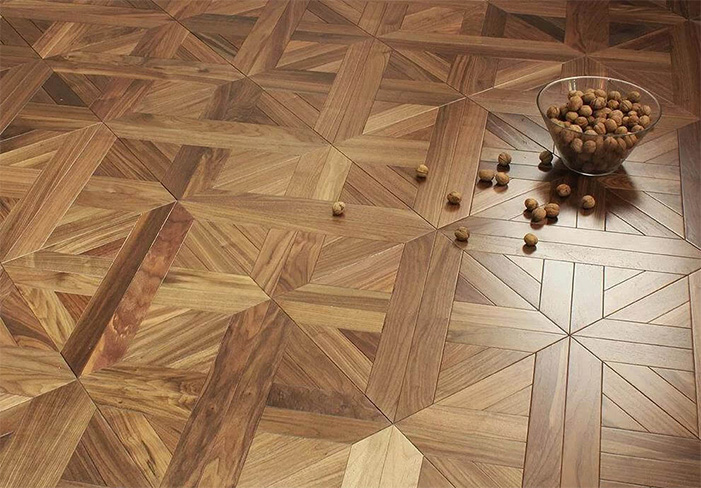
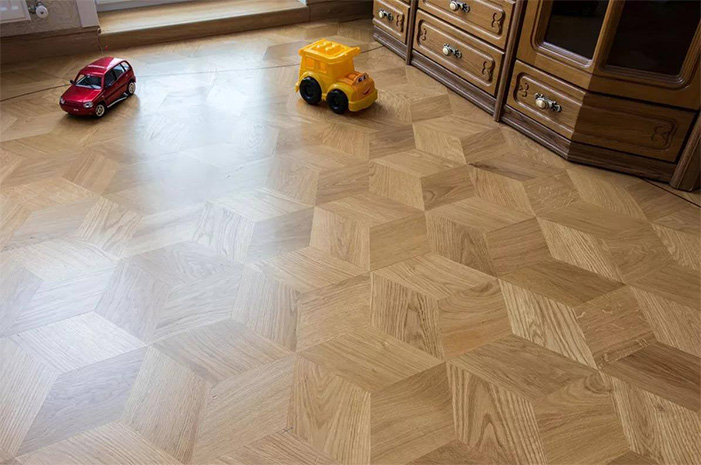
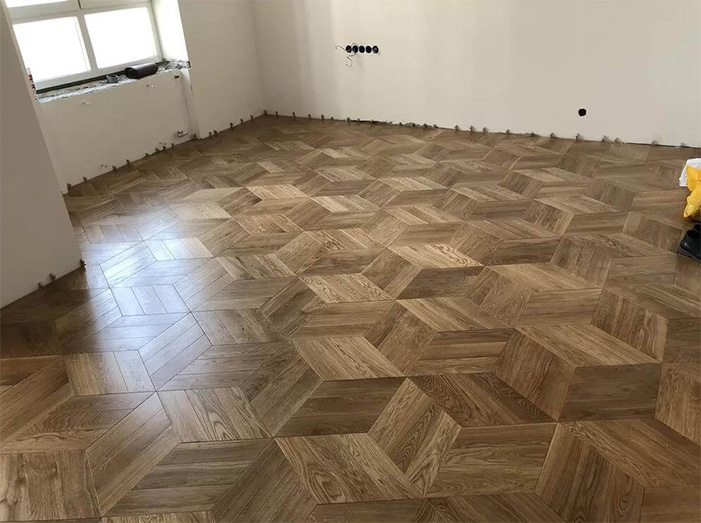
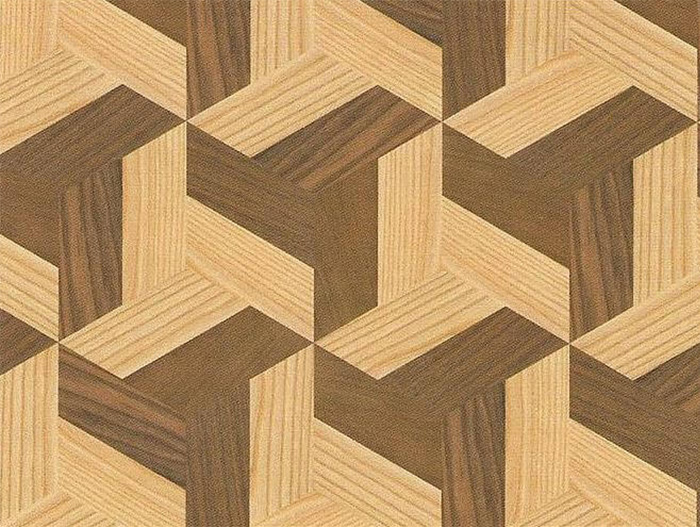
Rhombuses
Implies the creation of a drawing with a visual effect in the form of three-dimensional squares. To achieve a 3D effect, dice of different types of wood are used to create each square, for example, oak, maple and ash.
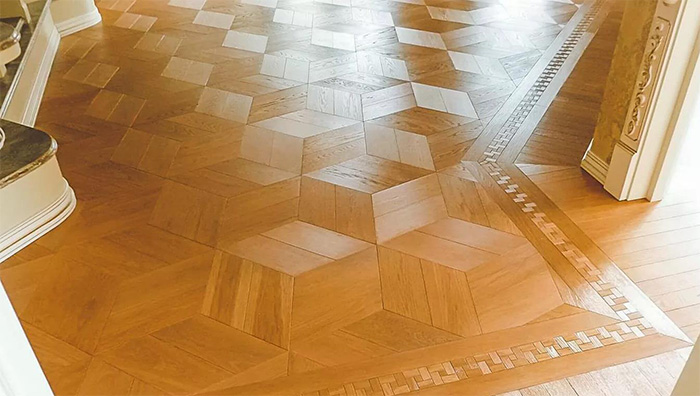
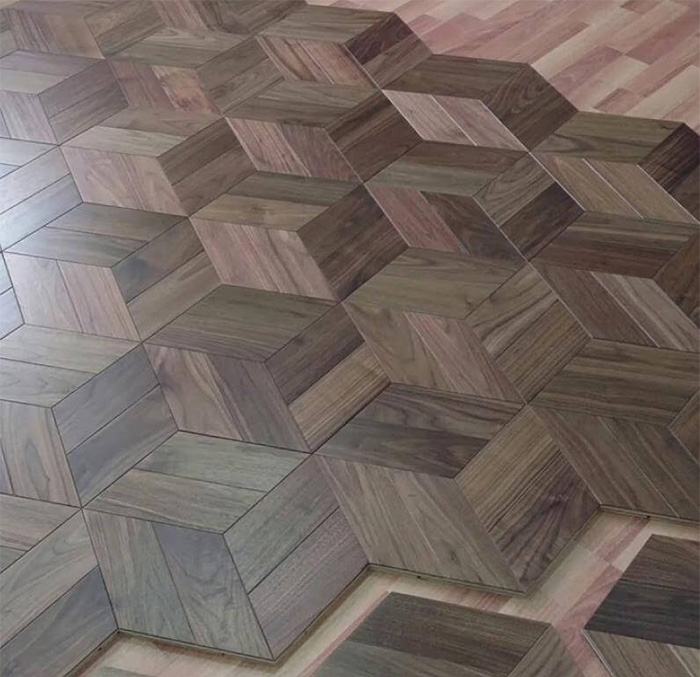
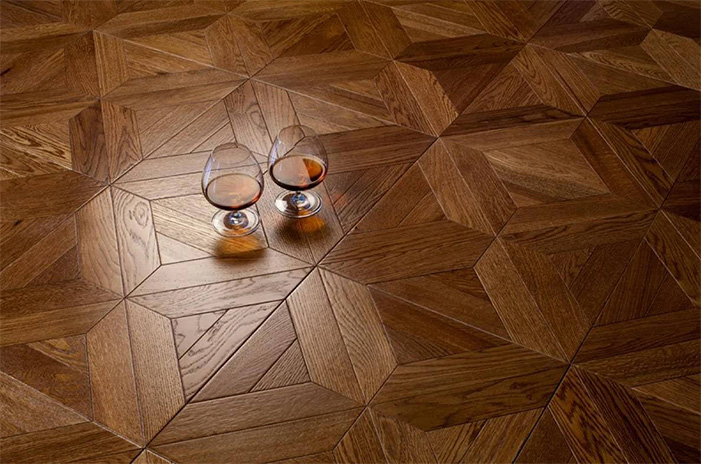
Sheremetyevskaya star
The pattern is built by analogy with a honeycomb in the form of hexagons. With the correct selection of faces, the image will take on a three-dimensional appearance.
This method of laying hardwood is very costly and complex. Waste is usually around 15-25%.
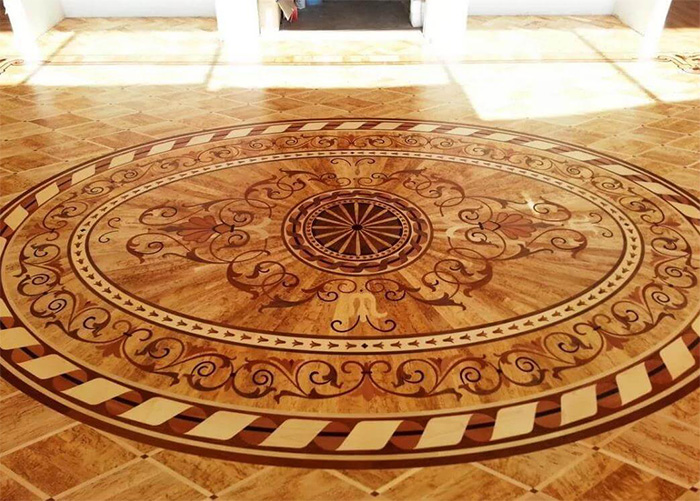
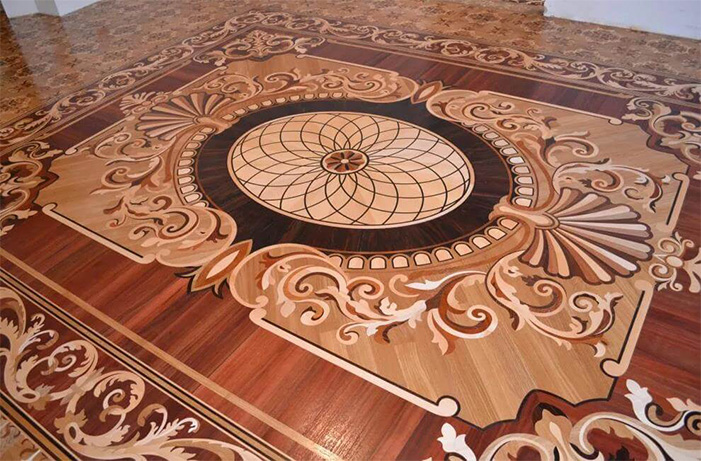
Artistic hardwood
The decorative and most aesthetic option, which includes various friezes, shapes, border designs and other elements.
The decoration of the hardwood flooring gives a wide scope for design ideas. The composition is thought out even before the components of the construction. Most often, for the manufacture of dies and other floor components are used valuable types of wood. Components of patterns from other materials are applied to their surface.
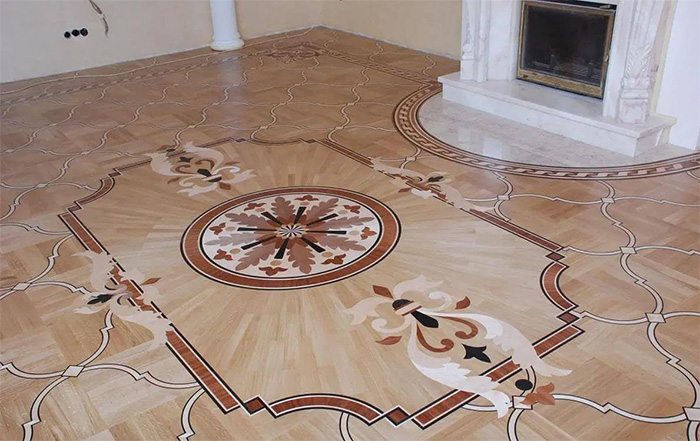
The installation process for decorative flooring is the same as for a conventional parquet floor, with the peculiarity that in this case, the installation of waterproofing on the base is required.
Also, such a floor easily deteriorates from scraping, so it requires a powerful varnish coating in 3-7 layers.
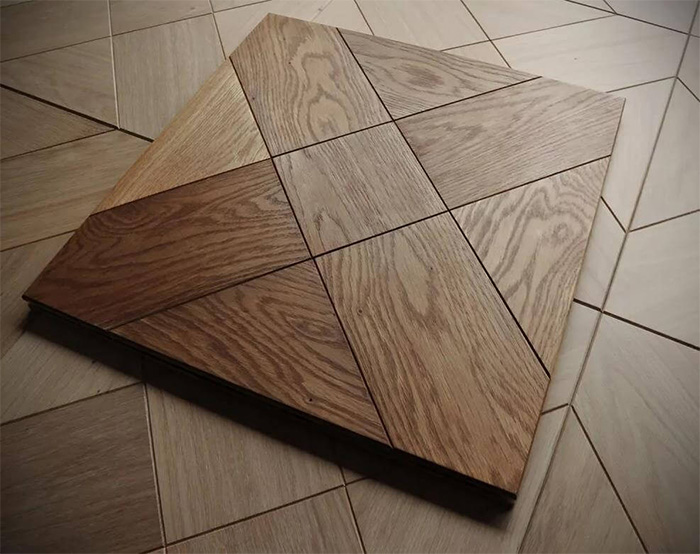
Modular hardwood
Modular hardwood is similar in design to tiles.
Models from different manufacturers differ in their performance. Most are equipped with a tongue-and-groove locking mechanism. Installation of modular parquet can be carried out in two versions:
- entirely throughout the room;
- in combination with a regular board of the same thickness.
Substrate requirements are the same as for other types of wood flooring. When laying on flat concrete, no additional plywood is required.
The tiles are fixed using special two-component glue and studs. If the surface of the covering elements is laminated, it is sufficient to rinse it after installation. If modular hardwood is laid in combination with other types, it will need to be sanded, putty and varnished.
Is it possible to install hardwood flooring on concrete?
It is allowed to install the hardwood on concrete or cement screed, but on condition that the surface of the base is perfectly flat. Installation is carried out exclusively on glue without additional fixation with nails or other fasteners. The adhesive must be highly elastic to reduce the chance of squeaking. Despite its economy, as well as less time and labor costs, this installation method is rarely used. The fact is that in such a situation, the chance of getting squeaky floors is quite high.
The thing is that the temperature and humidity expansion of hardwood is very different. Even special highly elastic glue does not always help. So, over time, the planks can change their size and structure, as a result of which they come off the adhesive layer and begin to rub against each other, making a creak. In order to prevent this, plywood sheets are laid on top of the screed or concrete, which have an intermediate thermal expansion between the concrete and the hardwood. It serves as a kind of compensator that prevents changes in the structure of the parquet. As a result, the boards are firmly attached to the mount, do not come off and do not creak.
The procedure for the installation of hardwood flooring
1. Measurement of the room

The first step is to measure the area of the room (length * width). It is also worth remembering that when buying a hardwood covering, you need to take into account 10-15% of the additional costs that are obtained due to boards of irregular shape and errors when cutting.
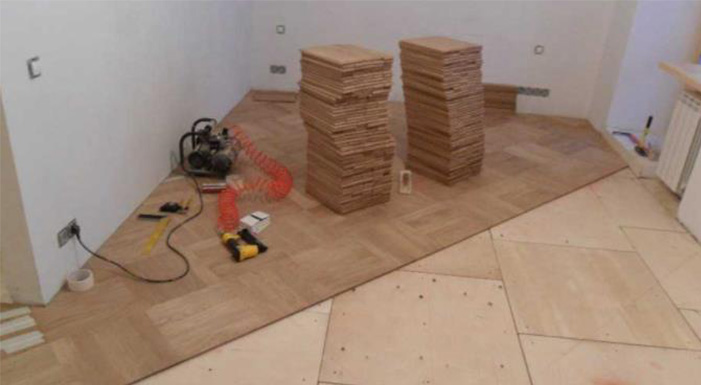
2. Preparation of the base
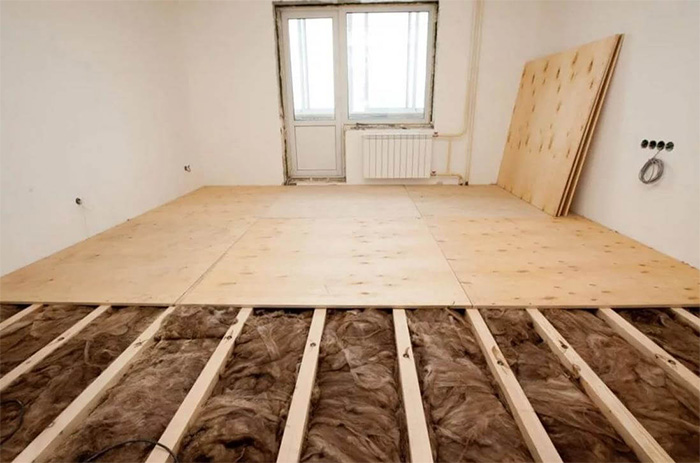
The base can be anything: cement and dry screed, concrete floor, plywood. It is important that the surface is dry and flat. The base is covered with 3/4 inch plywood (at least 2/3 of the thickness of the parquet boards).
Plywood is sold in large sheets, and if you put them in their original form, they will certainly creak, so each sheet is cut into 4 pieces on average. When laying on a screed or concrete, the parts will need to be done more, on average 6-8. In general, the more sheets the base is divided into, the higher the likelihood that the parquet will lie firmly and will not creak in the future.
Plywood sheets are attached to the base with self-tapping screws so that their heads do not stick out. Next, you need to make sure that there are no squeaks. If there are any, it will be necessary to fix the creaking board, for example, with a screws or nails.
If the base does not hold the fasteners well, it is recommended to additionally use glue for laying the hardwood, which is applied with a notched trowel.
When laying plywood sheets are displaced so that the seams of the previous row fall on the next. A gap of 3-5 mm is left between the sheets. A distance of 10 mm is also left between the wall and the base. Further, this gap is closed with a plinth, and it can also be filled with a sealant.
Plywood and hardwood are laid diagonally relative to each other so that their seams do not overlap. This is necessary to exclude the possibility of «lifting» the floor.
The room must be cleared of foreign objects, and thoroughly swept and cleaned.
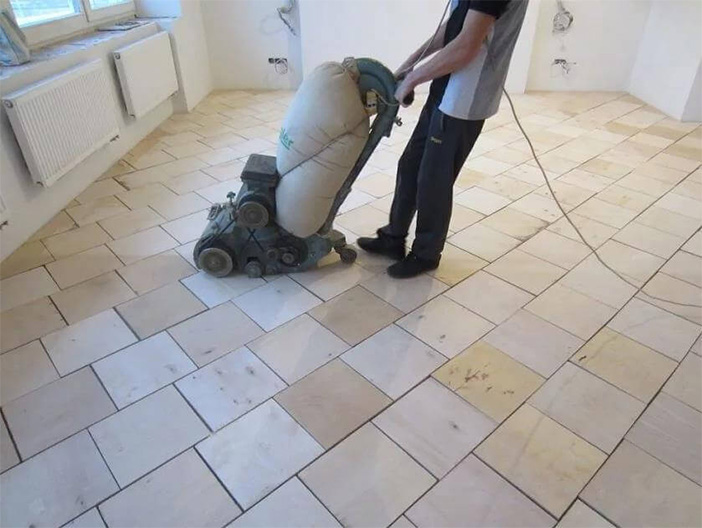
3. Grinding the base
After laying the plywood sheets, you need to wait 2-3 days. After the glue dries, the plywood will take on a working condition. Next, the base must be sanded to remove possible unevenness and height differences that may arise as a result of laying on glue or differences in sheet sizes.
4. Laying vapor barrier paper
The strips of vapor barrier paper are rolled overlapping each other at least 4 inches. They are fastened with staples. Typically 15 lb tar paper or felt is used.

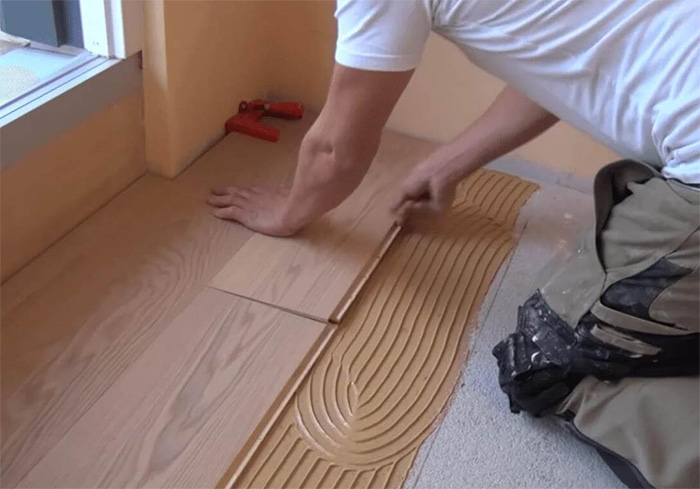
5. Laying the flooring
Before proceeding with the installation of hardwood flooring, the material itself must be kept indoors for several days so that it takes on the working humidity.
To lay the glue, you need a notched trowel with a tooth size of 3-4 mm and a width of 2-3 rows of strips.
At the wall along which the installation will be carried out, a starting line of the hardwood is installed at a distance of 3-8 inches from it, which will provide a technological gap and allow the covering to be consolidated. The gap between the wall and the covering will compensate for the expansion and contraction of the wood floor during temperature changes.
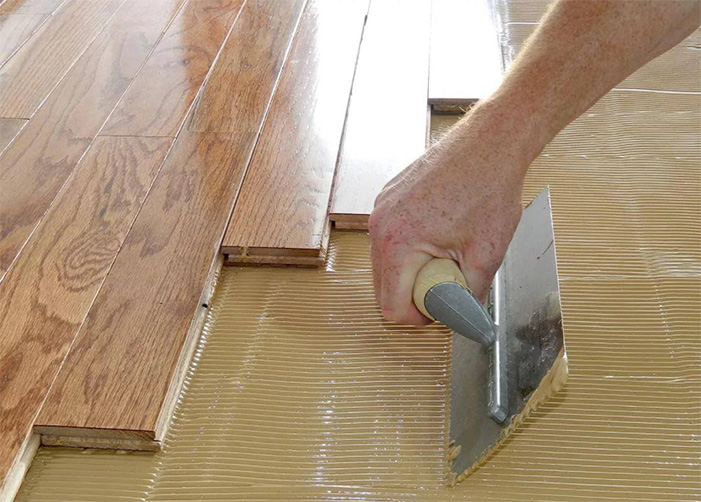
A long board is usually chosen to start the first row. It is nailed to the base. Glue (if used) is applied to a small area so that several planks can be placed on it.
Boards fit into the groove with a spike. To remove the gap and fix the plank, a special pneumatic gun is used. The edge of the pistol is placed on the edge of the board, after which it is struck with a hammer. The staple is hammered into the bar tab.

Each row is installed so that there are gaps between the board and the walls on both sides. You need to start a row not with a new one, but with a previously cut strip. Planks of one row are aligned using tongue and groove. The side groove of the installed strip must be greased with glue using a brush to attach the next board. It is imperative to make sure that the planks are tightly attached to each other, and there are no gaps between them.
If the installation took place on glue, you need to wait until it dries completely, the time is usually indicated on the package.
6. Filling in the gaps
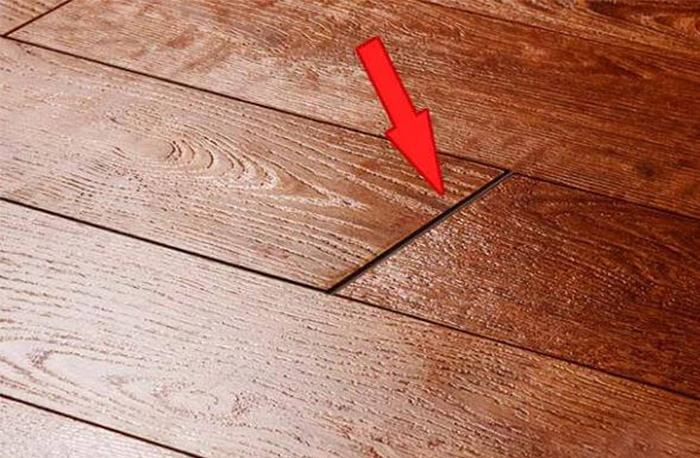
When installing hardwood flooring, remember that the planks are fastened through grooves and dowels. When cutting boards, you need to take care not to cut the grooves that fit the tongue, so that you can properly align the boards. Otherwise, a very large gap may result. To avoid this, it is better to cut the board against the wall.
Recommendation: desirable spacing between nails 10-12 inches.
7. Last rows
In the last rows, there is little place for a pneumatic pistol, so the boards have to be nailed down by hand with a hammer.
There is usually a narrow gap left for the last row. To fill it, you will need to cut the boards to width. It is imperative to remember about 3/8 inch of clearance to the wall for a margin for expansion of the covering.
At the end, you can remove the auxiliary parts, the first row plank and the spacer wedges around the perimeter.
8. Grinding and filler
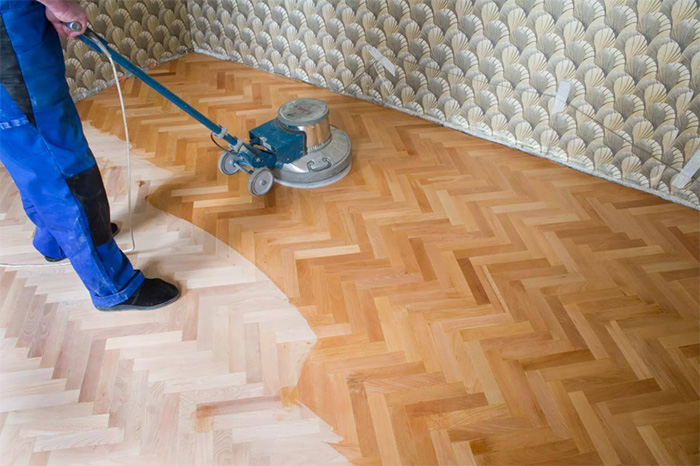
Most modern hardwood flooring does not require additional processing after installation. Although sometimes it is necessary to resort to grinding.
The floor is scraped with a special grinding machine in several stages, each time reducing the size of the used sandpaper (40 — 80 — 100 — 120). After the first two steps (40 — 80), the floor can be cleaned. After the third and fourth (100 — 120), the dust must be collected and left, it will come in handy when putting putty. The shops sell a special liquid for filling the floor. It is mixed with the resulting dust to the consistency of a thick slurry.
The composition can be mixed with any wooden or plastic stick or stainless spatula. It is not recommended to use plain metal. The putty is applied to the floor with a stainless trowel. It is recommended to choose a wide trowel and go not only along the seams, but also over the entire surface of the floor covering. As a result, the process occurs much faster, this method practically does not affect the material consumption, and at the same time possible defects of the boards and holes from nails are eliminated.
After sanding, the hardwood flooring is additionally processed with a belt sander with sandpaper of caliber 100 — 120. The dust is removed with a vacuum cleaner. The surface is ready for varnishing.
9. Hardwood varnishing
Varnish selection
The choice of varnish depends on personal preference. Someone wants a smooth glossy surface. Someone does not need gloss at all. However, these are just visual characteristics. An important criterion when choosing a flooring is also the type of varnish base, among which three main types can be distinguished:
- based on solvents;
- water;
- two-component.
Solvent-based varnishes have a strong odor. They can give a very expressive gloss, but when solid objects fall on the floor, they chip. Gradually, the mirrored surface of the floor is covered with defects, scratches and abrasions. There are heavy-duty varnishes in this group, but their cost is quite high.
In this regard, the most optimal option is dispersed one-component and two-component varnishes. One-component ones do not smell, but they dry for a long time. Two-component dries quickly, but emit a very unpleasant odor, it is allowed to work with them only in a respirator.
Hardwood priming
Before varnishing the floor, it is first primed. The type of primer depends on the type of varnish. It is better to buy formulations from one manufacturer, so there will be no problems with their compatibility. Parquet is primed in two layers. In the process, it is better to use a roller with a long handle. This greatly simplifies and speeds up the process.

The task of the primer is to prepare the floor surface for varnishing, to level its absorbency and reduce it.
After the first layer is dry, the surface should be checked for roughness, which may appear as a result of «lifting» of wood fibers impregnated with the primer. If the floor is very rough, it must be sanded with 100 — 120 grit sandpaper to a smooth finish. Next, apply a second coat of primer and check the surface again. If rough areas appear, we grind them too. If you have to sand a large surface, it is better to prime it again.
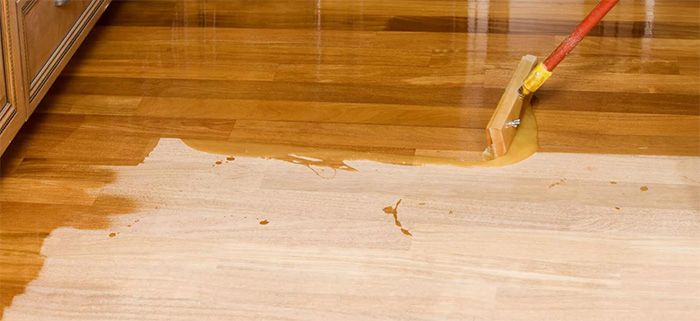
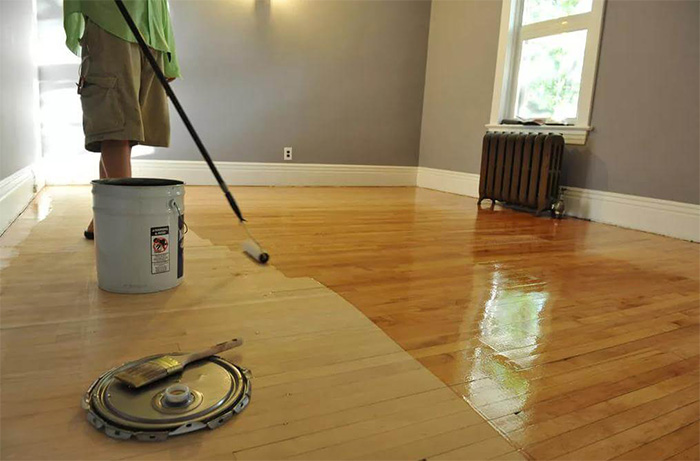
Hardwood varnishing
The varnish is applied to the primed floor covering. You can work with both a roller and a brush, but the roller is faster. Some types of varnishes have a viscous consistency. After applying the varnish, the surface does not become smooth, craters from a roller or a brush strip remain on it. Let the first two layers remain so. A little thinner should be added to the varnish before applying the final coat. It is selected depending on the type of varnish. Don’t add too much, the consistency of the composition should be slightly more liquid than usual.
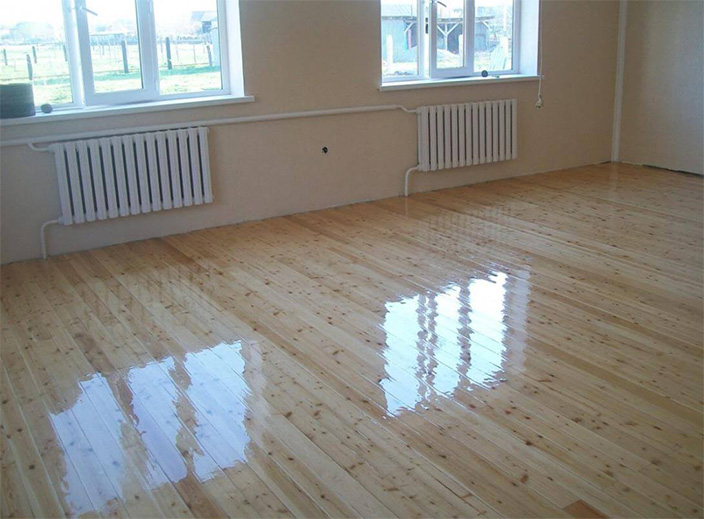
When varnishing hardwood, it is better not to rush and maintain the intervals between drying of each layer. It is strictly forbidden to apply the next layer until the previous one is completely dry. You need to apply varnish, evenly distributing it over the surface. Puddles and drips should be removed immediately. If defects are found after drying, they should be sanded with 150 grit or finer sandpaper. When varnishing parquet, it is better not to rush and maintain the intervals between drying of each layer. It is strictly forbidden to apply the next layer until the previous one is completely dry. You need to apply varnish, evenly distributing it over the surface. Puddles and drips should be removed immediately. If defects are found after drying, they should be sanded with 150 grit or finer sandpaper. Before applying the next layer of varnish, the dust must be removed, and then the floor surface is varnished again.
10. Caring for parquet flooring
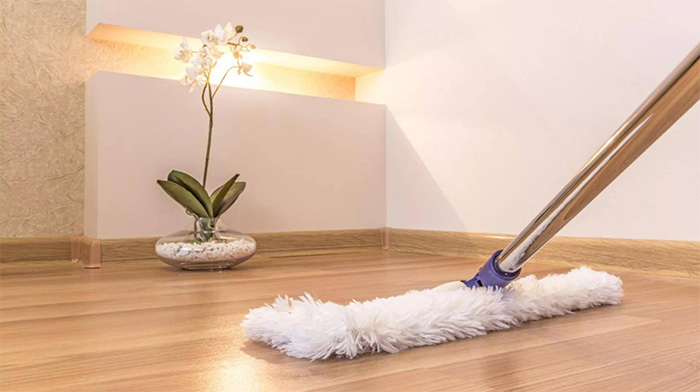
It is recommended that no sand gets on the surface of the covering. You should regularly sweep the floor and use special alcohol-based solutions for cleaning by spraying them over the floor surface and wiping with a damp cloth. The use of hardwoods significantly reduces the likelihood of dust mites.